
Assign equipment to a rental
Published 2026-07-11 · Updated 2026-09-30
Choose specific units for a rental line, check conflicts, and keep assignment separate from customer handover.
Before you start.
- Have a rental line for serialized equipment and a unit in the correct class.
Steps.
Open the equipment line
Take me there →Open the rental’s Equipment tab and use Choose equipment on the line that needs a machine.
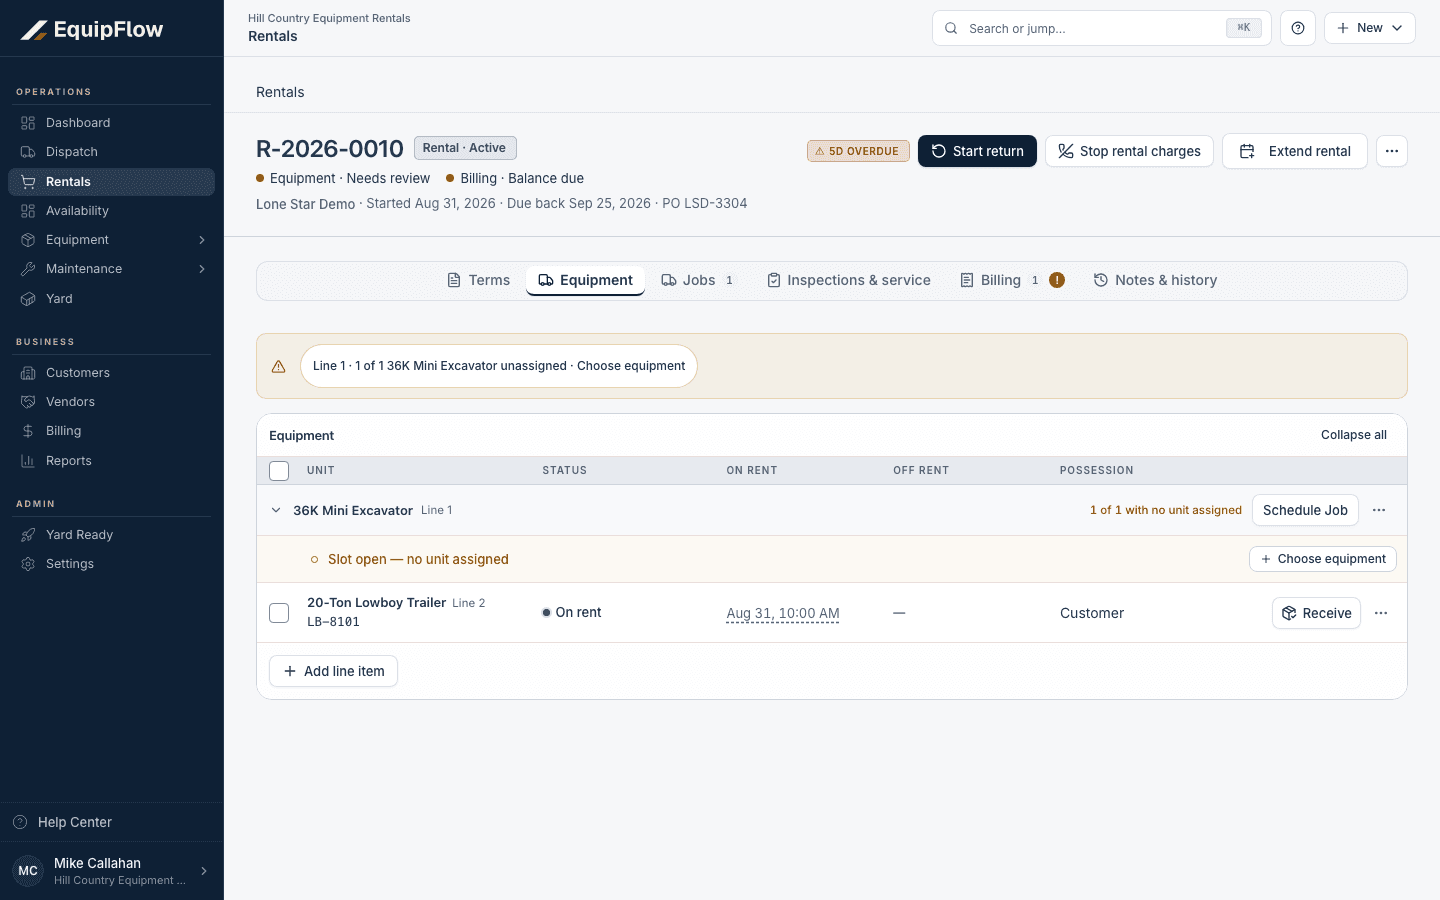
The Equipment tab identifies an open slot separately from a machine already on rent. Synthetic local example.
Open full-size screenshot (new tab)Check the unit before choosing it
Read readiness, location, possession, meter evidence, and overlapping commitments for the requested window. Review any warning before an allowed override.
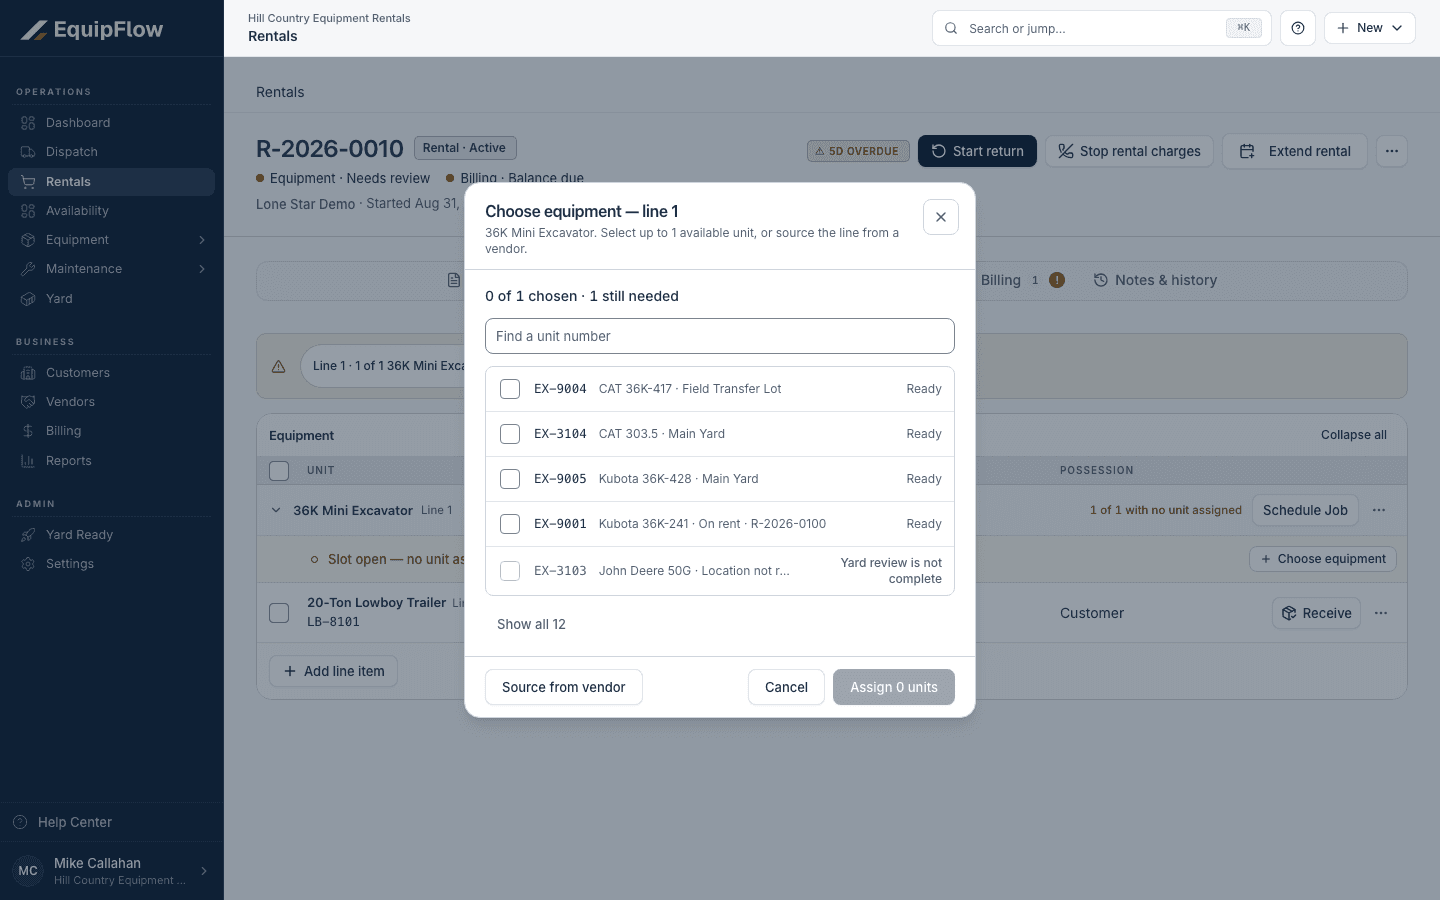
Choose equipment shows readiness, current selections, and Source from vendor. Synthetic local example.
Open full-size screenshot (new tab)Save and verify the assignment
Select the unit and choose Assign N units (N is the number selected). Check the unit number on the rental and the commitment on the unit detail. Record delivery or counter handover separately when it happens.
warning
For Re-Rent or pooled lines, use the supplier or quantity controls. Do not attach an owned serialized unit just to make those lines look fulfilled.
Common problems and recovery.
No suitable unit is offered.
Resolve the displayed blocker, choose another unit or window, or source a Re-Rent on the line.
The wrong unit was selected.
Before handover, use Change unit or Choose equipment, untick the incorrect unit, tick the correct one, and use Save for an existing selection or Assign N units for an open slot. After real handover, review custody evidence before changing history; use the swap guide for an actual replacement.
Continue in EquipFlow.
Open the product to do the work, or contact support if the saved information does not match what this article describes.
Last reviewed 2026-09-30 against EquipFlow product commit c0ec0c7b7.